A message from the future
Hi there! This is Joel Garcia from 2026, I wrote this back in 2022, so there are things that might be a bit confusing. So, two things:
- If you have any questions, please feel free to contact me via email (joel.garcia1202@hotmail.com). I completely understand if this is too vague or confusing. I wrote this a long time ago.
- If you want the prototype I used, I don’t have it! But you can request it to Alicia Lopez, who currently has it (aljornet@mit.edu).
Introduction
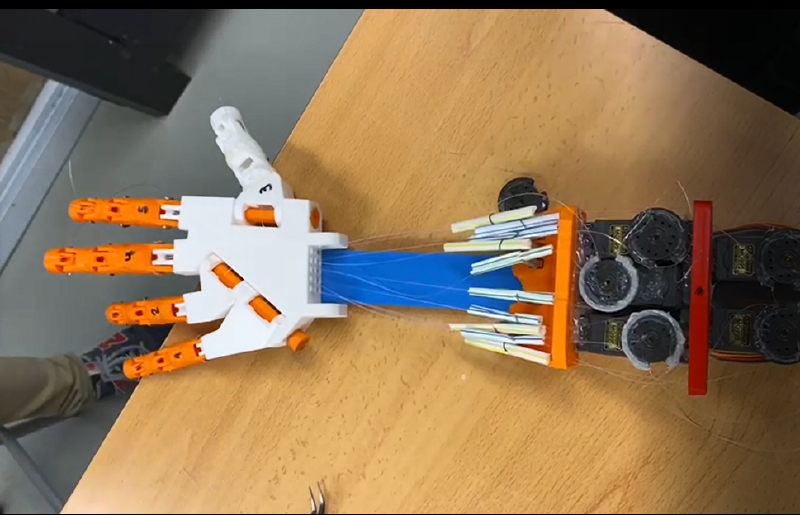
In this project, we recreated a human hand which can be moved using a sensor glove, which sends information to our hand from the other side of the world. This project was done with help of the MIT Edgerton Center and we would like to thank the help of the people listed bellow:
- Jordi Vidal ( Work experience at ESA )
- Lucas de Bonet ( MIT freshman 2021 )
- Edward Moriarty ( MIT Edgerton Center )
- Arnau Ortega ( CIC Student 2021 )
- Gerard Solanes & Bernat Gascón ( Thau SC )
This is a summary of the project, any questions feel free to ask :)
Supplies
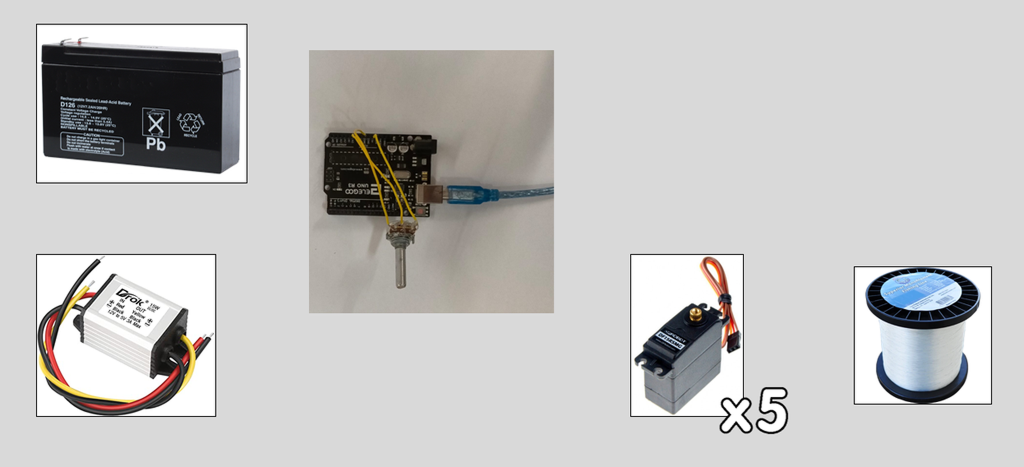 Materials Used
180 degrees servos Recommended Link
Arduino power supply / 12V to 5V converter + 12V battery
3D printed hand Recommended Link
Arduino Uno or ESP32
Potentiometers Recommended Link
Badge Reels Recommended Link
WD40
Nylon Gloves or similar Recommended Link
JST connectors Recommended Link
Fishing string
Building
Step 1: Download All Files & 3D Print Them
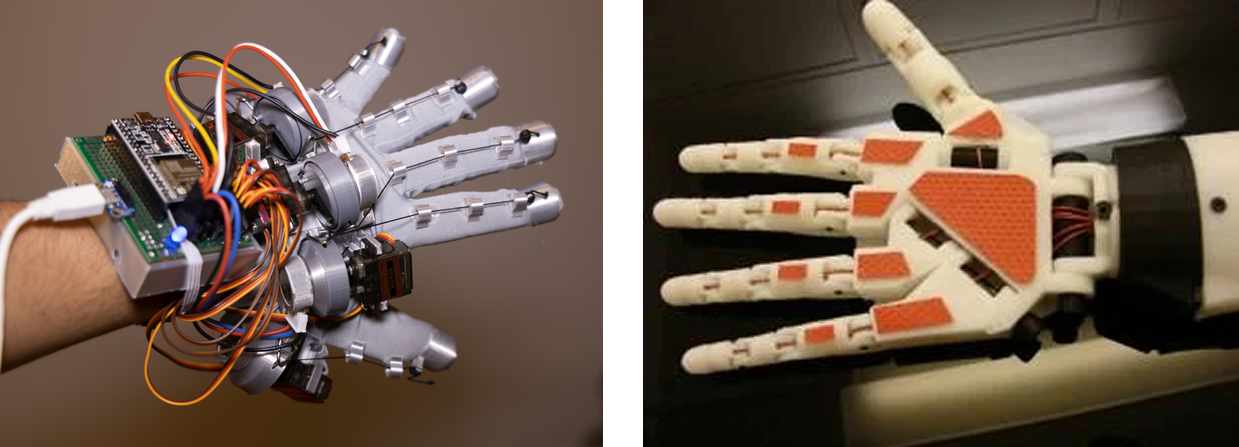
Download all necessary stl files from Inmoov (Link) and from LucasVR glove (Link)
Then Proceed to build them following their steps.
For our last prototype, we only used the hand from Inmoov and the servo holder, we then sticked them into a piece of PLA and used them that way, which is a much simpler way.
If prefered, you could use a smaller version with a potentiometer and a single finger (Link)
Step 2: Setting Up the Envoirement
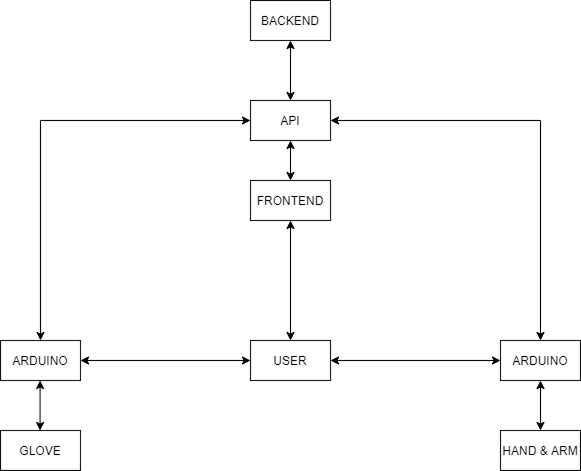
To set everything up, we need 3 things:
- A server / API , this can be hosted locally for debugging, but it is crucial to have one outside your local wifi for overseas testing. Code
- A Data Sender or glove
- And a Data receiver or hand
- (Optional) A Frontend to send debugging data to the API or using a tool like Postman
For the everything, you will need to use my driver, firmware & API cos, which usage are explained in the README file of each part. GitHub Link
Step 3: Connecting All Cables

The hand should be set up following this diagram and the Glove following lucas instructions ( Link)
You must bridge the power supply ground with the arduino one, if not, it will not work.
Step 4: Todo List Before Shaking Hands
 Once you have a running server, proceed to connect the arduino to your computer and start the driver.
If you run ./run.ps1 or ./start.sh, all dependencies will install and start the program
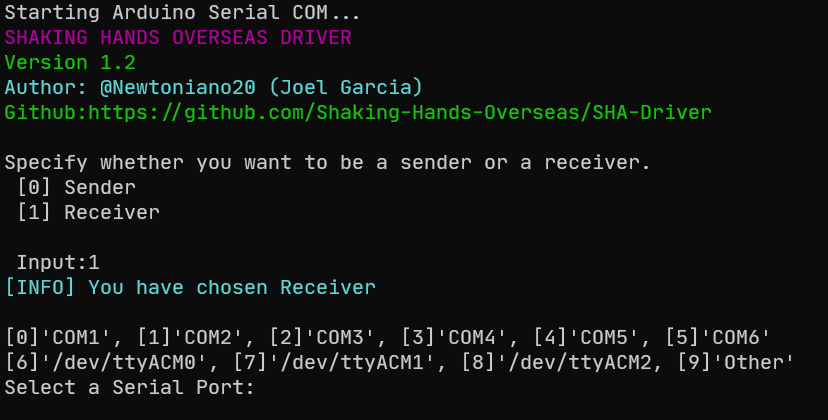
Once that is done, you will see a selection between Receiver or Sender. In the case you are acting as a hand, type 1 and otherwise type 0.
Then select serial port and it will start sending or receiving data. If your serial port is not present, type 9
You must upload the firmware before selecting serial port.
If you start seeing data coming in, you are ok, if not, check connections.
If your server requests fail, check if the API URL is ok and that you are connected to the internet
Step 5: Done
If all of the above are done, it should work. If you encounter any issue, please contact me.
Enjoy shaking hands overseas!